Here is everything (important) you need to know about drying chives at home.
Hardy and versatile, chives have always been a favorite among home cooks and professional chefs alike. Just about anything, from soups to sandwiches, can be made more flavorful with a few snips of the herb. Unfortunately, fresh chives aren’t always available—during winter, in particular, the plant dies down and only starts to grow again once spring comes.
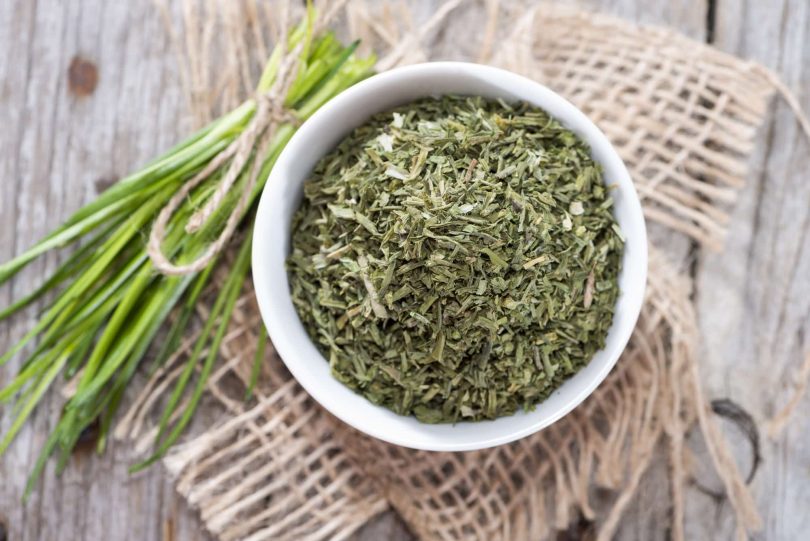
This is why many culinary enthusiasts end up trying their hand at drying chives. And soon enough, they discover that this preservation technique isn’t only about making sure that you have access to the herb at any given time. It’s also about concentrating the herb’s flavor and aroma, as well as its nutrient and antioxidant content.
Drying Chives: Everything You Should Know
Getting things ready
There are several ways of drying chives. But no matter which you choose, you’ll be following the same steps to get it ready—the first of which is harvesting. Just grab a bunch of leaves together and cut them near the base using either a well-sharpened knife or a pair of herb scissors. The latter is easier to use and is a good investment if you plan to dry other herbs.
Now check your bundle of chives for any dry or damaged parts and throw them away. You will have to do this carefully as failing to remove them all could cause bacteria or fungi to grow on the herb later on, ruining your hard work. Once you’re done, place it under running water to remove any debris, and then use a few sheets of paper towel to pat it dry.
With your knife or herb scissors, cut the leaves into smaller pieces. While the size ultimately depends on your needs and preferences, aiming for a quarter of an inch is most often a good starting point. It isn’t too big as to prolong the entire drying process, but it isn’t too small either that the pieces crumble far too easily.
Air drying chives
Being done with the prep work, it’s finally time to talk about drying. And of course, it’s only appropriate to begin with the simplest option—using air. This only requires you to place the cut-up chives on a clean baking pan and make sure that everything’s arranged in a single layer. Once daily, mix them around and afterward put them back the same way.
If you’re working with a much smaller amount of chives, you could just use a bowl for air drying. As long you’re able to keep them in a single layer, you should still be able to get rid of as much moisture as possible in a matter of days. You’ll know it’s done when the pieces feel completely dry and readily crumble when held.
As you can imagine, however, air drying isn’t the method for you if you live somewhere fairly humid. Not being exposed to heat, the herb could be susceptible to microbial growth. And if bacteria or fungi do end up thriving, your chives could very well become a potential health risk—or at the very least, lose much of their flavor and aroma.
Sun-drying chives
As you’ve learned, heat could make for a better drying process. And what’s a good source of it that doesn’t cost a thing?
The sun of course!
Sun drying is still fairly simple.
- Take a parchment-lined baking sheet and arrange the chives in an even manner. Again, you should make sure that no pieces are clumped together and everything’s in a single layer.
- Put the pan somewhere exposed to direct sunlight. As with the previous method of drying chives, you’ll have to toss the bits around occasionally to ensure that they dry evenly. Assuming that the sun’s out in full and the air is fairly dry, you could be done in a matter of hours. In some cases, a mere six hours is enough to rid the chives of moisture.
But as you can imagine, this approach isn’t perfect. In addition to the chance of contamination, you won’t have a surefire way of managing the amount of heat the herb is getting. If the sun’s too intense, the chives could end up far too dry way too quickly. So, you might have to check on them frequently just to make sure that everything’s progressing smoothly.
Drying chives in a dehydrator
While it’s arguably the best way of drying herbs, using a dehydrator is also the most expensive. A basic food dehydrator could set you back around 40 bucks, which could be tough to justify if you’re only looking to preserve chives. However, if you’re thinking of expanding your drying pursuits, moving to other herbs and eventually fruits, it’ll be money well spent.
So, how easy is it to dry chives with this sort of equipment?
- First, simply pre-heat your dehydrator at 90°F.
- Then, arrange the pieces on the dehydrator tray, making sure that they’re in a single layer across the silicone mat.
- Afterward, put the tray back in. By the way, if yours doesn’t come with a mat, you could always use parchment paper instead.
- Once six hours have passed, check if the chives have already become brittle. You may continue the process if they’re still not dry enough, though be sure to check once or twice per hour. Also, if the pieces you made are under a quarter of an inch, you will have to check on them earlier as they will dry much faster.
Just in case you’re wondering, yes, you could try doing the same with an oven but it’ll be rather inefficient—unless you’re drying a large batch. Aside from that, it’s much harder to maintain an even temperature, especially at the lower range. Ensuring that there’s enough airflow may likewise prove challenging.
Storing Dried Chives In The Right Way
After drying chives, storage comes next. This isn’t anything complicated though. Simply put the pieces inside a clean airtight container, and stash it somewhere dry and dark—such as in a cupboard in your kitchen. Remember that it’s only with proper drying and storage, that your chives will be to keep their flavor, color, and aroma for the longest possible time.