Hey there, fellow food enthusiasts! Today, I’m diving into a topic that’s close to my heart and my kitchen – how to dry dill. As a passionate cook and food blogger, I know the importance of preserving the incredible flavors of herbs like dill, even when they’re not in season.
See also how to grow dill indoors in pots.
So, get ready for a delightful journey as I share my personal experiences and tried-and-true tips on how to dry dill effectively.
How To Dry Dill
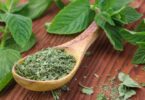
Getting Acquainted with Dried Dill
Let’s start our culinary adventure with dried dill, shall we? As someone who treasures the taste of fresh herbs, I couldn’t resist exploring how to dry dill to make its unique flavor last all year round. Whether you’re a seasoned chef or an aspiring home cook, these tips will surely become your kitchen companions.
Why dry dill when you can easily get it fresh, you ask?
Well, my fellow foodies, drying dill is like capturing its essence in a jar. The process intensifies its flavor, making every sprinkle a burst of delight. Plus, you get to enjoy dill’s magic even when it’s nowhere near the growing season.
Harvesting Dill: My First Step
Before diving into the drying process, you need quality dill. I recommend harvesting mature dill plants with lush green leaves and that unmistakable fragrance. Trust me; the fresher your starting point, the better the end result.
Now, let’s get into the juicy details – the different methods to dry dill. You’re in for a treat!
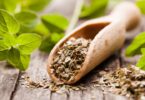
Preparing Dill for the Drying Process
Before embarking on the drying journey, I make sure my dill is squeaky clean and fully dry. A gentle wash and a loving pat-down ensure that my herb is ready for its transformation.
Step-by-Step Guide: Oven-Drying Dill
An oven-drying dill is a fantastic option if you’re looking for a quick and efficient way to preserve its flavor. Here’s how to do it:
- Start by preheating your oven to the lowest possible temperature. Aim for around 95°F (35°C). This gentle heat will help retain the essential oils and flavor of the dill.
- While the oven is preheating, prepare your dill sprigs. Gently wash them and pat them dry with paper towels. Remove any damaged or discolored leaves.
- Place the dill sprigs on a baking sheet lined with parchment paper. Make sure to leave some space between the sprigs for air circulation. This will help ensure even drying.
- Once the oven is preheated, place the baking sheet with the dill inside. Keep the oven door slightly ajar to allow moisture to escape. This will help prevent the dill from steaming instead of drying.
- Keep a close eye on the dill as it dries. Depending on your oven’s temperature, it may take a few hours to fully dry. Rotate the baking sheet occasionally to ensure even drying.
- To test if the dill is dry, simply crush a leaf between your fingers. If it crumbles easily, it’s ready. If it still feels slightly moist, continue drying for a bit longer.
Once the dill is fully dried, remove the baking sheet from the oven and let the dill cool completely. After cooling, gently remove the leaves from the stems and store them in an airtight container in a cool, dark place.
Step-by-Step Guide: Dehydrating Dill
A dehydrator is a foolproof way to dry dill while maintaining its vibrant flavor. Here’s how to do it:
- Start by washing and drying your dill sprigs. Make sure they are clean and free from any moisture.
- Lay out the dill sprigs on the dehydrator trays. Leave space between the sprigs to allow for proper air circulation.
- Set your dehydrator to a low temperature, around 95°F (35°C). This temperature ensures slow and thorough drying without overheating the dill.
- Allow the dill to dry in the dehydrator for about 1-2 hours. Keep an eye on the progress to prevent over-drying.
- Test the dryness of the dill by crushing a leaf between your fingers. If it crumbles easily, it’s ready. If it’s still slightly pliable, give it a bit more time.
Once the dill is dried to your satisfaction, remove it from the dehydrator and let it cool down. Gently remove the leaves from the stems and transfer them to an airtight container. Store the container in a cool, dark place to preserve the flavor.
Step-by-Step Guide: Air Drying Dill
- Bundle up dill sprigs and secure them with a rubber band.
- Suspend the bundles upside down in a breezy spot, away from direct sunlight.
- Give it around two weeks for the dill to dry completely.
- Gently detach the leaves and tuck them away in a sealed container.
Once dry, release those leaves from their stems and store them in a cozy container.
Microwave Magic: Drying Dill in a Pinch
- Nestle dill leaves between paper towels and microwave on low for 30 seconds.
- Keep an eye on them – microwave in 15-second spurts if needed.
Once you’ve got crispness, let them chill before stashing them away.
Storing Dried Dill: My Pro Tips
Ah, the final product – dried dill that’s ready to dazzle your dishes. To keep that flavor locked and loaded, store your dried dill in airtight containers. If you’re feeling fancy (like I often do), vacuum-sealed bags are your best friend.
Curious Cooks Ask: FAQs About Drying Dill
Ah, the questions that pop up like little bubbles while embarking on a culinary journey:
How to Dry Dill: Is Fresh Better or Dried?
Both have their charms! Fresh dill is vibrant and lively, while dried dill concentrates its essence. Choose based on your recipe and the flavor you’re aiming for.
Dried Dill Goodness: How Long Does It Last?
I know you might be wondering about the shelf life of dried dill. Well, when stored properly in a cool, dark place, your dried dill can retain its enticing flavor for up to a year. So, you’ve got plenty of time to enjoy its magic.
Kitchen Adventures: Can I Oven-Dry Dill?
Absolutely! If you’re feeling a bit adventurous, you can try oven-drying dill. Set your oven to the lowest temperature, spread out the dill on a baking sheet, and keep a close watch to prevent overcooking.
Flavorful Twists: Dishes Enhanced by Dried Dill
Get ready to unleash dried dill’s potential in your kitchen! Creamy soups, grilled fish, pickles, and even potato salads can all benefit from that unique dill flavor. Experiment and let your taste buds guide you.
Fresh Dill Quest: Where to Find When Not Growing?
Don’t worry if you don’t have a garden – you can find fresh dill at your local farmers’ markets or grocery stores. And if you’re feeling adventurous, consider growing a pot of dill indoors to have a steady supply.
In Closing: Embracing the Flavorful Journey
And there you have it, my dear foodies! Drying dill isn’t just a process; it’s a flavorful journey that lets you enjoy the magic of this incredible herb year-round. From the joy of harvesting to the excitement of experimenting with different drying methods, drying dill becomes a culinary adventure in itself.
So, the next time you stumble upon fresh dill or find yourself with an abundance from your garden, remember these steps, tips, and personal experiences I’ve shared. Drying dill might just become your new favorite kitchen ritual, adding a burst of flavor to your dishes whenever you desire.