Hey there! Today, I’m thrilled to dive into a topic that’s not only close to my heart but also a must-know skill for anyone looking to make the most of their garden harvest or simply stock up on some nutrient-packed goodness. Yes, you guessed it right – we’re talking about how to dry cabbage!
SEE ALSO: How to dehydrate vegetables
Drying Cabbage: A Step-by-Step Guide
Step 1: Choose the Perfect Cabbage
When it comes to drying cabbage, the first step is, of course, selecting the star of the show – the cabbage itself! Opt for fresh, firm, and blemish-free heads. The quality of your cabbage will directly impact the final product’s taste and texture. Remember, a healthy start leads to a delicious finish.
Step 2: Gather Your Supplies
Before diving into the drying process, make sure you have all the necessary supplies at your fingertips.
You’ll need a sharp knife, cutting board, large pot of boiling water, ice water bath, kitchen towels, baking sheets, and a food dehydrator or an oven.
These tools will be your trusty companions throughout the cabbage-drying journey.
Preparing the Cabbage
Step 3: Clean and Core
Start by giving your cabbage a thorough rinse under cold water. This will help remove any dirt or insects that may have hitched a ride from the garden. Once your cabbage is clean, use a sharp knife to carefully remove the core from the cabbage head. Don’t worry about making it perfect – just ensure there’s a hollow space where the core used to be. This step is all about getting your cabbage ready for the transformation ahead.
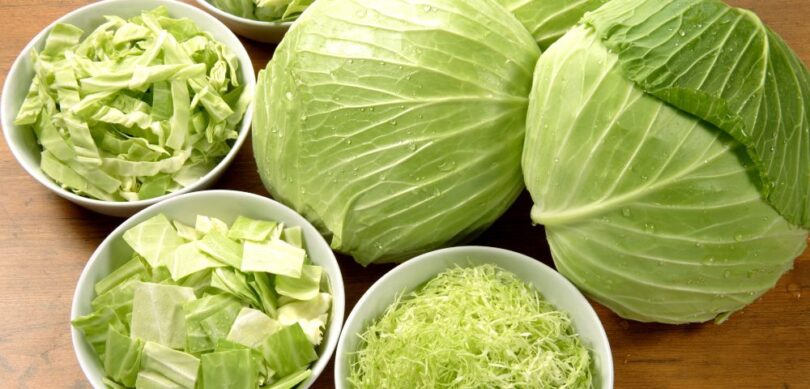
Step 4: Slice and Dice
Now comes the fun part – slicing and dicing the cabbage! You can choose the thickness of your slices depending on how you plan to use the dried cabbage later. Thin slices work well for adding to soups and stews, while slightly thicker pieces are great for snacks or adding a satisfying crunch to your favorite salads. Take your time with this step and relish in the meditative rhythm of slicing cabbage with purpose.
Step 5: Blanch for Optimal Results
Blanching is a crucial step in the cabbage drying process. It not only helps preserve the vibrant color and valuable nutrients of the cabbage but also kills any potentially harmful bacteria that might be lurking. To blanch, simply plunge the cabbage slices into a pot of boiling water for about 1-2 minutes. Then, quickly transfer them to an ice water bath to stop the cooking process. This rapid temperature change locks in the goodness you worked so hard to cultivate in your garden.
Step 6: Drain and Pat Dry
Once the cabbage slices have taken their icy plunge and cooled down, drain them thoroughly. A quick but gentle pat-dry with kitchen towels will help remove any excess moisture. This step is key to achieving that delightful crispness in the final product. Remember, moisture is the enemy of successful drying, so take the time to ensure your cabbage slices are as dry as can be.
Drying Cabbage
Step 7: Using a Food Dehydrator
If you’re fortunate to have a food dehydrator in your culinary arsenal, you’re in for a treat!
- Arrange the blanched and dried cabbage slices on the dehydrator trays, making sure they’re not overlapping.
- Follow the manufacturer’s instructions for the optimal drying temperature and time.
- Generally, cabbage should be dried at around 125°F (52°C) for 6-8 hours or until they’re crisp and break easily. The dehydrator will work its magic, transforming your slices into crunchy bites of cabbage goodness.
Step 8: Oven Drying
If a food dehydrator isn’t part of your kitchen lineup, fear not – your oven can also step up to the plate!
- Preheat your oven to the lowest possible temperature (usually around 150°F or 65°C).
- Arrange the blanched and dried cabbage slices on baking sheets in a single layer.
- Keep the oven door slightly ajar to allow moisture to escape, preventing your hard work from going soggy.
- This method might take a bit longer, around 8-10 hours, but the end result is just as rewarding.
Storing Dried Cabbage
Step 9: Cool and Test
Once your cabbage slices have undergone their transformative drying journey, it’s time to bring them back to room temperature. Allow them to cool completely, savoring the anticipation of the crunch that’s about to come. To test their dryness, try bending or breaking a few pieces. If they snap easily, you’ve nailed the drying process – congratulations!
Step 10: Store and Enjoy
With your dried cabbage ready to shine, it’s time to think about storage. Place the crispy slices in airtight containers or vacuum-sealed bags, ensuring no moisture can sneak in and compromise their texture. Store them in a cool, dark place to maintain their flavor and nutritional value. These versatile dried cabbage pieces can be added to soups, stews, salads, or even enjoyed as a wholesome snack. They’re a testament to your dedication to preserving garden-fresh goodness.
SEE ALSO: How to store dried vegetables
And there you have it, dear readers – a comprehensive guide on how to dry cabbage! With a handful of steps, some patience, and a dash of curiosity, you’ve unlocked the art of turning fresh cabbage into a delightful pantry staple. As you savor the unique taste and texture of your homemade dried cabbage, you’ll be reminded of the abundance of nature’s offerings and the joy of connecting with your food in a meaningful way. So, why not give it a try? Drying cabbage is not just a skill; it’s a journey that allows you to capture the essence of your garden and enjoy it all year long. Happy drying, and may your culinary adventures continue to flourish!