Today, I’m excited to dive into a timeless culinary adventure – drying plums.
As the seasons change, we often find ourselves yearning for the flavors of summer and fall, and drying plums is the perfect way to capture that essence. In this comprehensive guide, I’ll walk you through my personal journey of drying plums and share the step-by-step process, along with some mouthwatering tips. So, if you’re ready to embark on a delightful preservation journey, let’s dive right in!
Why Drying Plums is Worth Your Time
Before we delve into the nitty-gritty of the drying process, let’s take a moment to appreciate why this culinary endeavor is worth every bit of your time. Drying plums allows you to preserve their natural sweetness and intense flavor, making them a versatile ingredient that can be used in various recipes. From snacking and baking to adding them to your morning oatmeal, these dried beauties pack a concentrated punch of plumy goodness.
Read more about drying plums at home.
How to Dry Plums in the Oven
To begin your drying adventure, you’ll need a batch of perfectly ripe plums. Look for plums that are firm yet yielding, with vibrant color and a rich aroma. Your local farmers’ market or orchard is an excellent place to find plums at their peak.
Step 1: Wash and Sort
Once you’ve gathered your plums, it’s time to prepare them for their transformation. Start by giving them a gentle rinse under cool water to remove any dirt or residues. Pat them dry with a clean kitchen towel.
Sort through the plums, discarding any that are overly ripe or damaged.
Step 2: Remove Pits
Hold each plum in your hand and carefully cut along the natural seam. Twist the plum gently to reveal the pit. Remove the pit using a small knife or your fingers.
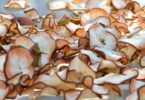
Now that your plums are pit-free, it’s time to slice them into even pieces. Aim for slices that are about ¼ to ½ inch thick, as this thickness ensures even drying.
Step 3: Slice Evenly
Use a sharp knife to slice the plums into consistent pieces.
Aim for uniform slices to ensure even drying.
Before we move on to the actual drying process, let’s take a detour and talk about pre-treatment. While this step is optional, it can significantly enhance the flavor and texture of your dried plums.
Step 4: Optional Pre-Treatment
Gently blanch the plum slices in boiling water for about 1 minute.
Transfer the slices to an ice water bath to halt the cooking process.
Pat the slices dry with a paper towel before proceeding.
Drying Plums in the Oven
Now comes the exciting part – the drying process itself! There are various methods to dry plums, but I’ll share my preferred method: oven drying.
Step 5: Oven Drying
Preheat your oven to 175°F (80°C).
Arrange the plum slices on a baking sheet in a single layer, ensuring they don’t overlap.
Place the baking sheet in the oven and prop the oven door open slightly to allow moisture to escape.
Step 6: Rotate and Monitor
Every hour, rotate the baking sheet to ensure even drying.
Keep a close eye on the plums, as drying times can vary depending on the plum’s moisture content and thickness.
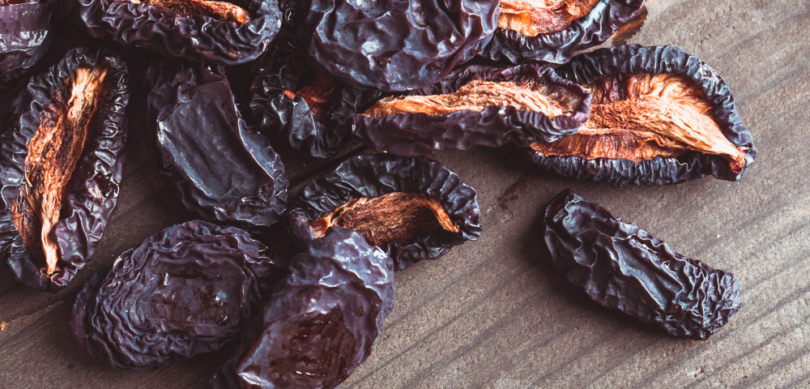
Step 7: Test for Doneness
After about 4-6 hours, start testing the plums for doneness.
They should feel leathery to the touch and not sticky.
Remember that they will continue to firm up as they cool.
Storing Your Dried Plums
Congratulations! You’ve successfully dried your plums to perfection. Now, it’s time to store them properly to enjoy their goodness for months to come.
Step 8: Cool and Store
Allow the dried plums to cool completely before storing.
Store them in airtight containers or vacuum-sealed bags.
Keep them in a cool, dry place away from direct sunlight.
Your journey doesn’t end with the drying process – it’s just the beginning of a world of delicious possibilities. Let’s explore some ways to incorporate these flavorful gems into your culinary creations.
And there you have it – a comprehensive guide on how to dry plums, straight from my personal experiences. Drying plums is a wonderful culinary adventure that lets you capture the essence of the fruit’s sweetness year-round. From the initial selection of plums to the final chewy bites, each step is a labor of love that rewards you with incredible flavor and versatility. So, if you’re ready to embark on this delicious journey, gather your plums, follow the steps, and let the magic of drying unfold in your kitchen. Happy drying!