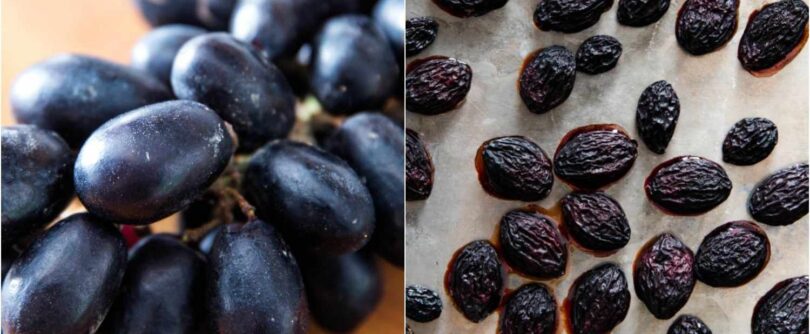
Here are the easiest steps for drying grapes in the oven!
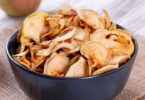
Although it may seem absurd to dry your own grapes in the oven, doing so allows you to have far greater control over the outcome and opens the door to a plethora of flavor and texture options. The handmade variety can turn out plumper and juicier, with a more genuine flavor than that of a fresh grape but more intense than store-bought varieties. Incorporate them into baked products, such as Bran Muffins, offer them on a cheese board at a gathering, or use them as a regular component of salad dressings.
SEE ALSO: 3 Easy Methods of Dehydrating Grapes
Easy Steps for Drying Grapes in the Oven
How to Choose Grapes for Drying
Unlike several other fruits, grapes do not continue to ripen after harvest. As a result, they should be bought at their optimum quality and sweetness. Here’s a simple guide on picking grapes while shopping to assist you with your decision.
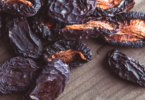
Red grapes produce the most recognizable results, but green grapes produce a lighter, golden-brown raisin. Seedless grapes are preferable but not required when purchasing grapes. Grape seeds give the delicious delight a subtle crunch and are high in heart-healthy nutrients.
- Color is an excellent predictor of the eating experience you may expect while choosing grapes. When green grapes are yellow-green, they are tastiest and have the finest flavor. Red grapes have the finest flavor when they are mostly red, while black grapes have the best flavor when they are dark and rich.
- The grapes should be solid, plump, and connected to the stems securely. Wet, moldy, or shriveled grapes at the stem attachment are signs of degradation and should be avoided. The stems of fresh grapes will be green and supple instead of being dry and brittle when they aren’t.
How to Prepare Grapes for Drying
They may be dried without any preparation other than washing, but blanching them softens the skin, making the grapes more sensitive and allowing for even drying.
- Blanching Method: Blanch grapes in boiling water for 30 seconds for each bunch, then transfer to a dish of cold water to cool. Remove the grapes from their stems. Dry with a towel and distribute on baking sheets in a single layer.
- Freezing Method: Instead of putting them in hot water, it’s been discovered that freezing them in a single layer on a baking sheet causes the skins to shatter.
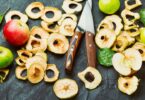
- Cutting Methods: Slice it open with a knife. If you want something more like store-bought raisins, don’t chop all the way through. Grapes can also be cut in half. This is best for the larger-sized grapes rather than the little ones. You can also make holes in the skin by piercing it. Use a metal hair pick or a metal or wooden skewer to do this swiftly.
Drying Grapes in the Oven
The size of your grapes (bigger grapes will take longer to dry than smaller grapes) and the way your oven operates (certain ovens are prone to severe temperature changes, which can speed up and/or slow down the total drying time) will affect the specific cooking time significantly. Ensure that you regularly monitor the growth of your grapes to avoid any unfortunate events from transpiring.
- Step One: Preheat the oven to 150 – 200 degrees Fahrenheit (90 degrees Celsius). Wait for about 15 minutes after setting the temperature, giving the oven time to come up to temperature. Do not put your grapes in the oven before it has been warmed; otherwise, their quality will be compromised.
You may bake grapes into raisins in around 4 hours or less using this temperature. If you like to create raisins more slowly, you can set your oven to 150 degrees Fahrenheit (66 degrees Celsius) and bake your grapes longer. Slower heating of the grapes results in a lengthier process, but it lowers the possibility of overcooking or overdrying the grapes.
- Step Two: Choose your favorite way of preparing your grapes.
- Step Three: Grease two rimmed baking sheets with a tiny quantity of vegetable or canola oil. After that, equally, distribute your grapes across the sheets. As much as possible, keep the grapes from touching each other.
If you don’t want to use oil, you may use parchment paper instead. While you should spread your grapes out on the trays so that they have enough distance between each other, your raisins will not be harmed if they contact.
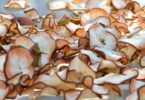
- Step Four: When drying grapes in the oven, bake them for 4 to 6 hours or until shriveled in the oven. The raisins should be mostly dry yet still somewhat plump. To avoid any mistakes, check in multiple times during the baking process. If the grapes are adequately dry before then, you may remove them after less than 4 hours.
- Step Five: Remove the raisins from the oven and set them aside to cool for at least 30 minutes once they have dried sufficiently. Use a thin metal spatula to loosen any raisins stuck to the baking sheet.
How to Store Dried Grapes
Place your raisins in a well-covered container and place them in the refrigerator. As soon as the raisins have cooled fully, move them to an airtight container that can be sealed with a lid for storing. The raisins should be kept fresh by storing the jar in the refrigerator. Your raisins should be good for up to 3 weeks if stored in the refrigerator.
SEE ALSO: How to Store Dried Fruits at Home