One of the most popular techniques in fruit and vegetable preservation is drying. It is the process of removing water and moisture from a fruit or vegetable to give it a longer shelf life. Successful pumpkin drying requires hot temperature, good air circulation, and low humidity. Drying pumpkin can be done at home using simple methods and procedures.
Beginners Guide to Drying Pumpkin
Preparation
A good preparation before drying pumpkin is essential to prevent color and flavor changes. It can also avoid excessive sugar and nutrient loss.
- Choose a ripe and good-quality pumpkin fruit.
- Wash the pumpkin under running water. Using a fine vegetable brush, scrub the outer covering, gently.
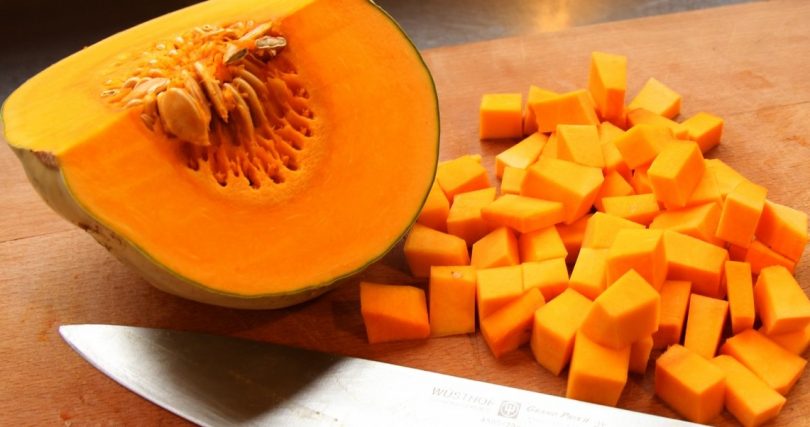
- Cut the fruit in half. Scoop out the seeds.
- Scrape out stringy membranes using a pumpkin scraper or a spoon.
- Peel the two halves and cut them into smaller pieces, about 1/8-inch thick. You can also make pumpkin cubes of the same size.
- Soak the slices into a bowl of lime juice. This will prevent oxidation or darkening of the fruit after slicing. You can also blanch the sliced pumpkin for better results.
When the preparation is done, it time to start the drying process. Here are five different methods of drying pumpkin.
Sun drying pumpkin
This is one of the natural methods of fruit and vegetable drying. An effective sun drying requires direct sunlight, outside temperature of 80°F – 90°F, and a humidity of less than 20%. Since the weather is uncontrollable, sun drying can be risky.
Steps
- Place a clean cloth on a drying tray. Then, arrange the pumpkin slices on the tray. Make sure there is space between the slices, to allow air to circulate around.
- To speed up the drying process, cover the tray with a clear glass. This will also protect the slices from bugs and other insects.
- Bring the tray outside. Place it in an open space with direct sunlight. Make sure that the temperature outside is 80°F – 90°F or higher.
- Dry for 5-7 days. Flip the slices every five hours for uniform drying.
- Bring the tray inside at night. This will prevent the cool air to condense and add moisture back to the pumpkin slices.
Check for dryness. The dried slices should be hard and brittle.
Freeze drying
This uses a freezing temperature to remove water from the fruits and vegetables. This method can be done using a freeze-dryer or a freezer. Freeze-drying works by removing fruit and vegetable juices through vaporization.
Steps
- Arrange the slices/cubes on the tray and cover it with a cheesecloth or nylon netting. Let the air circulate around by providing space between slices.
- Put the tray in the freezer. Avoid constantly opening and closing the freezer door. Ice crystals will form on the pumpkin slices if exposed to the hot outside air.
- Set the freezer to its lowest possible temperature. This will ensure uniform drying and avoid excessive nutrient loss.
- Freeze dry for 3-4 weeks.
- After 4 weeks, check if they are ready. Take one out and let it thaw. If it turns black immediately, it is not yet ready.
Let it stay in the freezer for another week before checking again. It should not change its color when melted.
Drying pumpkin in the microwave
This is the fastest way to dry fruits and vegetables. Microwave drying works by using heat energy to remove the moisture from foods. This drying method ensures uniform drying. This is also considered as one of the best techniques in drying.
Steps
- Arrange the slices on the microwave plate. You can also use microwavable containers. Make sure to provide space between the slices to allow the air to circulate around them.
- Set the microwave oven to ‘high’. Then set the timer for 15-20 minutes.
- After 20 minutes, get a slice to check if crunchy. If not, microwave again for 5 minutes.
- Allow the dried slices to cool for 5-10 minutes.
Keep a constant eye on the microwave, to avoid burning your pumpkin.
Drying pumpkin in the oven
This drying method is slower compared to microwave drying. Ovens do not have a built-in fan for better air circulation. Ovens are also not as efficient as dehydrators in terms of energy conservation. This method is typically used in occasional drying.
Steps
- Arrange them on the oven tray. Do not let the slices touch each other. Provide a 2 mm distance between slices for good air circulation.
- Put the tray inside the oven. Set to 140°F-160°F.
- Let it run for 3-4 hours.
- Prop the oven door slightly open to allow the moisture to escape. This will also make better results.
You can place a fan in front of the oven to improve air circulation.
Drying pumpkin in the food dehydrator
It is considered the best method in dehydrating fruits and vegetables. Dehydrators have vents and a fan for better air circulation. These devices preserve more nutrients from foods compared to ovens.
Steps
- Arrange the slices on the dehydrator tray. Use more dehydrator trays if necessary.
- Set the dehydrator reading to 150°F-165°F, then dehydrate for 10-12 hours.
- Check if they are ready. Get one pumpkin slice and bend it. It should be as crunchy as a banana chip.
- If not, dehydrate for another two hours.
- Allow the slices to cool for 5-10 minutes.
READ ALSO: Which Food Dehydrator is Right for You
How to store dried pumpkin
Oven-dried pumpkins can be stored in airtight containers or glass jars with lids.
Freeze-dried pumpkins can be kept in vapor-proof freezer cartons and heavy-duty freezer bags.
Dehydrated pumpkins are best stored in airtight containers. Storing dried foods in air-tight containers keep them free from moist and air.
Place the containers in a dark, dry, and well-ventilated room. A dark place can help retain the nutrients of the dried pumpkins up to one year. You can also put them in the freezer, in your emergency kits, or inside the cabinets.
Food drying is one of the best ways to preserve foods for later use. Through this process, you can enjoy eating your favorite dishes all year round. In drying pumpkin, you have to consider the availability of materials to be used. You also have to follow the correct procedures for the better result. Use the available materials at home and you’re good to go.
Image: Wildernessmag