Today, I want to share with you my personal experiences and a step-by-step guide on how to dry herbs in the oven.
Believe me, drying herbs is a game-changer when it comes to preserving their incredible flavors and ensuring you have access to them all year round. So, let’s jump right into it!
Why Oven Drying Rocks!
When it comes to preserving herbs, oven drying has become my go-to method, and for good reason! It’s super convenient and efficient, giving you quick results without compromising on flavor. Plus, it saves you time compared to traditional air drying. The controlled heat of the oven speeds up the drying process, while still maintaining those precious essential oils and flavors that make herbs so special. And the best part? It’s beginner-friendly, so anyone can do it!
How to Dry Herbs in the Oven
Choosing the Perfect Herbs to Dry
Before we dive into the step-by-step process, let’s talk about selecting the right herbs for drying. While you can dry a variety of herbs, I have some personal favorites that work exceptionally well:
- Rosemary: This herb is a flavor powerhouse! Its robust taste and delightful pine-like aroma make it an excellent choice for drying. You can use it in a wide range of dishes to add a punch of flavor. (How to dry rosemary)
- Thyme: Ah, thyme! With its earthy and slightly minty flavor, it’s a true gem to have in your herb collection. Whether you’re cooking up roasted meats, stews, or sauces, dried thyme will take your dishes to the next level. (How to dry thyme)
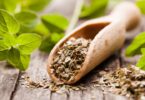
- Oregano: If you love Italian and Mediterranean cuisine, oregano is a must-have. Its strong and zesty flavor intensifies when dried, giving your dishes that classic Mediterranean flair. (How to dry oregano)
- Sage: Sage is one of those herbs that adds a unique and savory touch to any dish. Its slightly peppery taste pairs perfectly with poultry dishes, stuffings, and even teas. (How to dry sage)
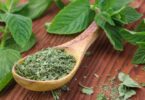
- Mint: Mint leaves are refreshing, aromatic, and oh-so-versatile. Drying mint allows you to enjoy its invigorating qualities in herbal teas or as a delightful garnish for various dishes. (How to dry mint)
The Step-by-Step Process: Let’s Get Drying!
Now, let me guide you through the process of drying herbs in the oven. Trust me, it’s easier than you think!
- Preheat your oven to the lowest temperature setting, usually around 180°F (82°C). This low heat ensures that your herbs dry evenly without scorching.
- Give your herbs a gentle rinse under cool water to remove any dirt or debris. After that, pat them dry using a paper towel or let them air dry completely. Remember to handle those delicate leaves with care to avoid any bruising.
- Once your herbs are nice and dry, it’s time to separate the leaves from the stems. Woody or tough stems won’t dry well, so discard them.
- Line a baking tray with parchment paper and arrange your herb leaves in a single layer. Make sure they have some space between them for proper airflow and even drying.
- Pop the tray into your preheated oven, leaving the door slightly ajar to let moisture escape. This is important to prevent any buildup of moisture that could ruin your drying process.
- Keep an eye on your herbs as they dry. The time can vary depending on the thickness and moisture content of the herbs, typically taking anywhere from 1 to 4 hours. You’ll know they’re ready when they’re dry and crumbly to the touch.
- Once your herbs have reached that perfect dried consistency, take them out of the oven and let them cool completely before handling. Patience is key here!
Storing Your Flavorful Treasures
Once you have your dried herbs, it’s essential to store them properly to maintain their freshness and flavor. Here’s what I do:
- After your herbs have cooled completely, give them a gentle crush using your hands or a mortar and pestle. This helps release their aromatic oils and enhances their flavor. Trust me, the scent alone will make your kitchen feel like a fragrant herb garden!
- Put the crushed herbs into airtight containers such as clean glass jars or resealable bags. You don’t want any moisture sneaking in and ruining your herbs, so make sure the containers are dry.
- Label each container with the name of the herb and the date of drying. This way, you’ll always know which herb is which and when it’s time to refresh your stash. It’s like creating your own little herb library!
- Find a cool, dark spot in your kitchen to store your herb containers. Direct sunlight and heat can zap away the flavors and quality of your dried herbs, so keep them away from windows and stovetops. A cupboard or pantry works perfectly.
When it’s time to use your dried herbs in recipes, remember that their flavors are more concentrated than fresh herbs. Start with a smaller amount and adjust to taste. You can always add more if needed. Remember, a little goes a long way!
So there you have it, my fellow herb enthusiasts! By following these steps, you can confidently dry herbs in your oven and have a continuous supply of flavorful ingredients at your fingertips. From cooking up delicious dishes to brewing herbal teas, your dried herbs will add that extra oomph to your culinary adventures.
FAQs: Your Burning Questions, Answered!
Can I dry herbs other than the ones mentioned in the article?
Absolutely! While I highlighted some fantastic herbs, don’t limit yourself. Feel free to experiment with your favorite herbs and see how they transform when dried.
How long do dried herbs last?
When stored properly in airtight containers, dried herbs can retain their flavors for up to one year. That’s plenty of time to work your culinary magic!
Can I use the oven-drying method for delicate herbs like basil?
While oven drying can be used for delicate herbs, keep in mind that they might lose their vibrant green color during the process. If appearance is crucial to you, air drying might be a better option for preserving their visual appeal.
What are some creative ways to use dried herbs?
Oh, the possibilities are endless! Use your dried herbs to create marinades, rubs for meats, infused oils for salad dressings, or homemade spice blends. They also add depth to soups, stews, pasta sauces, and roasted vegetables. Let your culinary imagination run wild!
Remember, my friends, the journey of drying herbs in the oven is a delightful one. So gather your favorite herbs, embark on this aromatic adventure, and let the flavors infuse your dishes with pure herbaceous joy.
Now go forth, dry those herbs, and create culinary masterpieces that will make your taste buds dance with delight!
Happy herb drying, my fellow foodies!