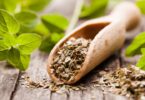
How to dry mint? Here are my tips for drying mint at home.
Mint, with its refreshing aroma and distinct flavor, is a versatile herb used in various culinary applications and herbal remedies. As a food blogger who loves exploring the world of flavors, I often find myself with an abundance of fresh mint. To ensure that I can enjoy its essence throughout the year, I have discovered the art of drying mint. In this article, I will guide you through the process, sharing my personal experiences and tips for preserving the freshness and flavor of this delightful herb.
Benefits of Drying Mint
Drying mint offers several advantages that make it a popular preservation method among culinary enthusiasts and herbalists. Allow me to highlight some of the benefits I have experienced firsthand:
- Extended Shelf Life: Dried mint can be stored for an extended period compared to fresh mint, ensuring its availability even when the herb is out of season.
- Concentrated Flavor: The drying process intensifies the flavor of mint, allowing you to use less while still enjoying its characteristic taste. It adds a delightful burst of minty goodness to any dish or beverage.
- Versatility in Culinary Creations: Dried mint can be used in various dishes, including teas, soups, stews, salads, and desserts. Its concentrated flavor enhances the profiles of these culinary creations, adding a unique touch to your recipes.
- Herbal Remedies: Mint has long been known for its soothing properties and potential health benefits. Dried mint serves as a key ingredient in many herbal remedies, providing relief for digestive issues, and respiratory ailments, and promoting relaxation.
How to Dry Mint
Harvesting Fresh Mint
Before we delve into the drying process, it is important to start with freshly harvested mint. Here’s how I go about it:
- Timing is Everything: Select a sunny morning to harvest mint leaves when their flavor and aroma are at their peak. Trust me; this makes a significant difference in the end result.
- Gentle Harvesting: Armed with gardening shears or scissors, I carefully cut the mint stems close to the base, ensuring there’s room for regrowth. It’s best to harvest the mint before it starts flowering to maintain the best flavor.
- Quality Check: After harvesting, I inspect the leaves, discarding any damaged or discolored ones. This ensures that only the freshest and healthiest leaves make it into the drying process.
Read also How to grow mint indoors
Preparing Mint for Drying
Proper preparation is key to achieving optimal drying results. Here’s what I do to prepare mint for the drying process:
- Rinsing the Leaves: I gently rinse the harvested mint leaves under cold water, removing any dirt or debris that might have accumulated. This step ensures cleanliness and enhances the overall quality of the dried mint.
- Drying the Leaves: Once the leaves are rinsed, I gently pat them dry using a clean kitchen towel or paper towels. This step helps remove excess moisture, allowing for better airflow during the drying process.
- Leaf Separation: With the leaves now dry, I carefully remove them from the stems, discarding any leaves that appear discolored or damaged. This ensures that only the finest mint leaves make it into the drying phase.
Air Drying Mint: Preserving Nature’s Essence
Air drying is a traditional method that brings out the best flavors in dried mint. Here’s how I air dry mint:
- Bundle and Hang: I gather a small number of mint stems, typically 6 to 8 stems, and bundle them together. Using a rubber band or a string, I secure the stems tightly.
- Choose the Right Spot: I look for a well-ventilated area away from direct sunlight to hang the mint bundles. This could be a dry and airy room or a shaded spot outdoors.
- Patience is Key: I let the mint bundles hang upside down for approximately two to three weeks. During this time, the leaves gradually dry out, and their flavors concentrate.
- Testing for Readiness: To check if the mint is fully dried, I gently touch the leaves. If they crumble easily and feel crisp, they are ready for the next step.
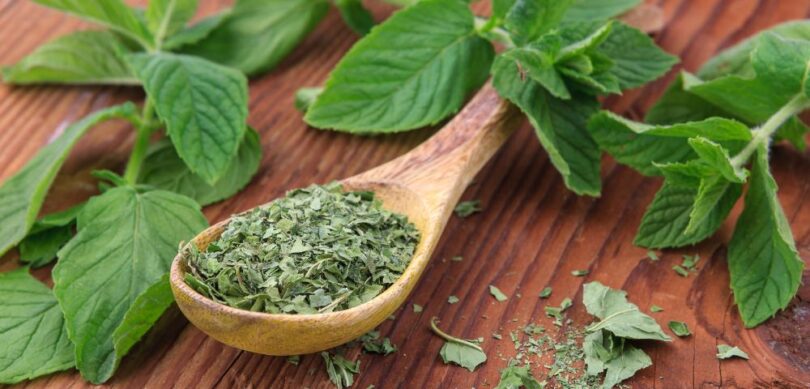
- Separate and Store: Once the mint leaves are dry, I remove them from the stems and store them in airtight containers, like glass jars or resealable bags. Proper storage helps preserve their freshness and flavor for a longer period.
Drying Mint in the Oven: Quick and Efficient
If you’re short on time and want to expedite the drying process, using the oven is a viable option. Here’s how I dry mint in the oven:
- Preheat and Prepare: I preheat my oven to the lowest temperature setting, typically around 150°F (65°C). While the oven is preheating, I prepare the mint leaves for drying.
- Arrange and Bake: I spread the mint leaves in a single layer on a baking sheet lined with parchment paper. This ensures even heat distribution and prevents the leaves from sticking to the sheet.
- Careful Monitoring: I place the baking sheet with the mint leaves in the preheated oven. I keep the oven door slightly ajar to allow moisture to escape during the drying process. It’s important to keep a close eye on the leaves to prevent burning.
- Optimal Results: I let the mint leaves dry in the oven for approximately 1 to 2 hours, checking them regularly. Once they are dry, I remove them from the oven and allow them to cool completely.
- Storing for Future Use: After cooling, I transfer the dried mint leaves to airtight containers. By storing them properly, away from moisture and light, I can maintain their freshness and flavors for an extended period.
Using a Dehydrator: Efficient and Precise Drying
If you have a dehydrator at your disposal, it offers a convenient and efficient method for drying mint. Here’s how I use a dehydrator:
- Prepare and Arrange: I spread the mint leaves in a single layer on the dehydrator trays, ensuring that they are not overlapping. This allows for proper airflow and even drying.
- Set the Temperature: I set the dehydrator to a low temperature, typically between 95°F (35°C) and 115°F (46°C). This gentle heat gradually removes moisture from the leaves while preserving their flavors and colors.
- Patiently Wait: I allow the mint leaves to dehydrate in the machine for approximately 2 to 4 hours. The exact drying time may vary depending on the dehydrator model and the thickness of the leaves.
- Final Check and Storage: Once the leaves are crispy and break easily when touched, I know they are fully dried. I let them cool before transferring them to airtight containers, where they can be stored for future use.
Storing Dried Mint: Protecting the Flavor
Proper storage is crucial to maintaining the freshness and flavor of dried mint. Follow these guidelines to ensure your dried mint remains aromatic and delicious:
- Choose the Right Containers: Place the dried mint leaves in clean, airtight containers such as glass jars or resealable bags. This prevents moisture and air from affecting the quality of the dried herb.
- Keep It Cool and Dark: Store the containers in a cool, dark place, away from direct sunlight. Exposure to light can degrade the flavor and aroma of dried mint.
- Label for Freshness: It’s helpful to label the containers with the date of drying. This way, you can keep track of their freshness and use them accordingly.
- Handle with Care: Avoid crushing the mint leaves until you are ready to use them. Crushing them prematurely can cause a loss of flavor and potency.
Culinary Delights with Dried Mint: Unleashing Flavorful Possibilities
Dried mint can be a delightful addition to various culinary creations, adding a burst of flavor and aroma. Here are some popular ways to use dried mint in your recipes:
- Herbal Teas: Infuse dried mint leaves in hot water to create a refreshing and soothing herbal tea. You can enjoy it hot or chilled over ice for a cooling summer beverage.
- Seasoning and Garnish: Use dried mint as a seasoning for roasted vegetables, and grilled meats, or as a topping for salads and soups. It adds a unique twist to your dishes.
- Baking Delights: Incorporate dried mint into baked goods such as cookies, cakes, and muffins. Its subtle minty flavor can elevate the taste of your sweet treats.
- Marinades and Dressings: Add dried mint to marinades and dressings for a vibrant and aromatic touch. It pairs well with both savory and tangy flavors.
- Herbal Remedies: Dried mint is a key ingredient in herbal remedies for digestive issues, respiratory ailments, and relaxation. Explore its potential in natural remedies and reap its soothing benefits.
Read also How to dry mint leaves for tea
In conclusion, drying mint is a simple and rewarding process that allows you to enjoy its delightful flavor and aroma all year round. By following the methods discussed above, you can preserve the freshness of mint and unlock its culinary and medicinal potential. So, get ready to harvest and dry your mint, and let its aromatic essence enhance your culinary adventures. Experiment with dried mint in various recipes, and discover the versatile ways it can elevate your dishes.
Frequently Asked Questions (FAQs)
Can I dry mint using a microwave?
It’s not recommended to dry mint using a microwave as it can cause the leaves to lose their flavor and texture. Stick to the air drying, oven drying, or dehydrator methods for optimal results.
How long does dried mint last?
When stored properly in airtight containers, dried mint can last for up to one year. Just make sure to keep it away from moisture and direct sunlight.
Can I dry different mint varieties using the same methods?
Yes, the methods discussed in this article can be applied to various mint varieties. Whether you have spearmint, peppermint, or any other variety, you can follow the same steps for drying.
Is dried mint as flavorful as fresh mint?
While dried mint has a more concentrated flavor, it may not be as vibrant as fresh mint. However, it still adds a delightful minty taste to your recipes. Just remember to adjust the quantity accordingly, as dried mint has a stronger flavor.
Can I use dried mint in place of fresh mint in recipes?
Yes, dried mint can be used as a substitute for fresh mint in recipes. However, keep in mind that dried mint has a more concentrated flavor, so you’ll need to use a smaller quantity to achieve the desired taste.
Now that you have learned how to dry mint and the various ways to use it, it’s time to embark on your own mint-drying adventure. Enjoy the process of harvesting, drying, and storing your mint, and let its captivating essence infuse your culinary creations with its unique and refreshing flavor. Happy drying!