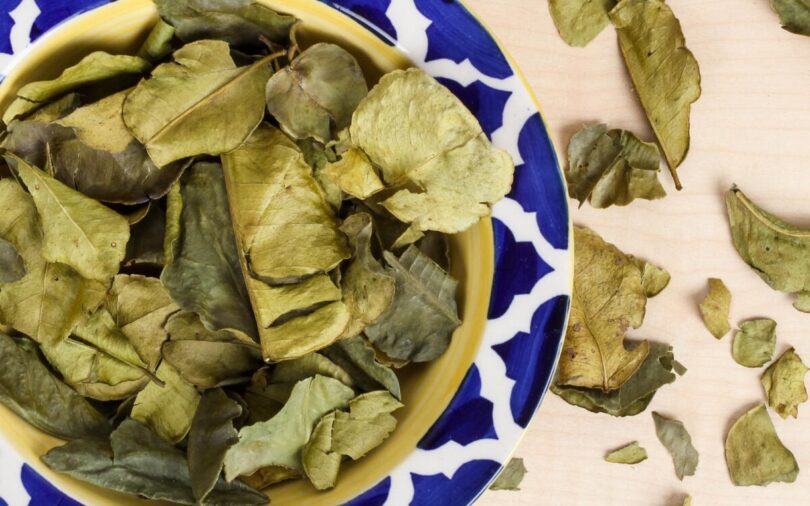
Learn how to dry kaffir lime leaves at home!
One of the most sought-after leaves that gives a citrusy aroma and taste is the lime kaffir leaves, a common staple in Thailand and across Southeast Asia. It packs a strong and distinct citrus flavor that can dominate any dish’s flavor profile. Many enjoy using this fresh, but fresh kaffir lime leaves only often last for about a week, without proper drying, the leaves will lose their potency which will significantly affect their aroma and flavor.
So to best preserve that distinct characteristic of the kaffir lime leaves, dry these leaves using any of these two ways.
How to Dry Kaffir Lime Leaves
Air drying kaffir lime leaves
If you have a lot of other leaves or herbs that you’d like to dry and keep for future use, the natural air drying method might be a good option for you. You don’t necessarily need to buy new equipment if you don’t have them already or if you’re fairly new to trying dried leaves and herbs. Here’s what you need to do:
Rinse the kaffir lime leaves – regardless if you have a small punnet or a whole basket, you’ll need to clean each leaf to make sure it’s clean and free from any dirt, insects, or debris that can be stuck on the surface. Keep in mind that these leaves are ready for consumption or use once dried, and you don’t want to end up using dried kaffir leaves that are not clean. You can either submerge all your leaves in a pot of clean water, a basin, or any container that’s big enough to accommodate all your leaves. You can initially swish them around, take them out, and do it again for a few times to help loosen whatever’s attached to the surface. Use your fingers when cleaning the leaves so you can feel if they’re actually clean or not.
Dry your leaves – when you’re happy with how much you’ve cleaned the kaffir lime leaves, you’ll need to dry them up with towels or paper towels to remove any excess moisture or water from the leaves’ surface. Wipe or pat each one dry, careful not to rip or damage the leaves in the process. Keep in mind that you need to do this on both sides.
Remove the stem – using a sharp knife, slice the leaf’s stem on both sides. These stems are not really usable even when fresh since it’s tougher, chewier, and a little more bitter than the leaves. Don’t rush the process as you don’t want to end up leaving slithers of stem still attached to the leaves.
Identify your drying area – don’t just leave your kaffir lime leaves anywhere in your home. It will need a dry and warm environment that’s free from moisture and direct sunlight. It should also have ample air circulation to make the drying process more effective and quicker. If the spot you choose fails any of the aforementioned conditions, you may end up with improperly dried kaffir lime leaves. A few good spots will probably be your pantry, clean kitchen cupboards, a garden shed, garage, or even your attic. Avoid doing this in your basement as these spaces tend to be humid and moist.
Prepare the kaffir lime leaves for drying – once you’ve got your eyes set on the spot where you’ll be drying your leaves, carefully arrange them on a try or wicker basket. Do not stuff a bunch of leaves together and call it a day. Separate your leaves into small batches to avoid overcrowding. Make sure that there’s enough space in between the leaves to allow for proper air circulation. Crowding your kaffir lime leaves will result in a longer drying time. If you’re making a lot and don’t have enough space, you can string these leaves together using a needle and let it run long like Christmas strings made of popcorn. Just don’t forget to put spaces in between each leaf and string if you intend to tie them together.
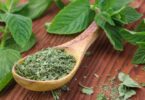
Start the drying process – once you’ve properly arranged and prepared your kaffir lime leaves, all that’s left to do is wait and periodically check how they’re doing. This may take anywhere between a week and a month. The length of time sorely depends on the drying conditions. Since this is quite the wait, it would be wise to label each batch with the date it started drying. This will give you a good but quick guide on how long it’s been hanging out to dry. When you’re done, you should end up with something that looks like dried oregano or dried bay leaves.
Try to take a piece and crumble it. If it falls off easily and is quite brittle, then your kaffir lime leaves are ready to be used or stored.
Drying kaffir lime leaves in a dehydrator or oven
Clean the leaves – put all your kaffir lime leaves in a large container or basin and fill it with water. Inspect each leaf as you go to ensure that there is no unwanted debris or leaf damage that will affect the quality of your leaves. Gently rub the leaves while submerged in water to clean them thoroughly. Don’t worry about the stems for now. Once done, you can put them all in a colander and run them under the faucet to give it a final rinse.
Remove excess moisture – after each leaf has been washed, lay your kaffir lime leaves on a clean towel or on a tray that’s lined with paper towels. Using more paper towels, pat the surface dry to remove any excess moisture that’s leftover from washing. Don’t forget to flip each leaf and pat the other side dry as well.
De-stem your kaffir lime leaves – take a leaf and lay it flat on a chopping board. Use a sharp knife to remove the middle part or the stem, which is harder than the rest of the leaf. Cut from both sides to fully detach and ensure that no part of the stem is left attached to the soft leaves. Discard the stems afterward. You won’t be needing those since they’re not really good to dry and do not retain any of the flavors or the aroma that you want in your dried leaves.
Prepare for dehydration – carefully lay each leaf on the bottom of your dehydrator tray. Make sure that there’s enough space in between to allow good air circulation that will make the drying process efficient. You’ll know you’re doing it right if you can still see the bottom of the tray in between the leaves and when there are no overlaps. Avoid overcrowding your tray as this will not give you the results you want. Start dehydrating using a low temperature. It’s best to allow the kaffir lime leaves to dry slowly than to rush it and end up with practically unusable leaves. It may take around 18 hours to complete, but you’ll still need to check to ensure it’s done. If it still feels a little soft or moist, continue dehydrating until all the moisture has been removed.
If you use the oven to dry kaffir lime leaves, do all the preparations as mentioned, but instead of a dehydrator, put the leave into the oven. Dry them at a minimum temperature. Check the leaves hourly.
How to Properly Store Kaffir Lime Leaves
Drying the leaves is actually just half the battle. You’ll also need to ensure that each one is properly stored to preserve all the citrusy goodness the kaffir lime leaves have.
Use resealable plastic bags – this one is a practical choice for those that have quite a lot of dried kaffir lime leaves. Put small batches in each bag so that there will be minimal exposure to the rest of the batch whenever you open the bag.
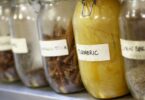
Airtight containers – a screw-top container is not exactly ideal; opt for jars with rubber lining on the lid (or leakproof containers) as these are really sealed once closed. This will help preserve your kaffir lime leaves for some time.
Label – put a label on your container that tells you when it was dried, when it was packed or stored, and when is it likely still good to use. This will also help prevent accidentally using a newer batch. Remember, when it comes to food, first in, first out should be the rule.