Here are all the important things you need to know about drying herbs in the oven.
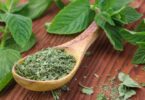
Drying your own herbs is an excellent way of dealing with over-productive herb gardens. It’s a good way to collect and store your excess harvest without letting anything go to waste. Once dried, your harvest can be stored in airtight containers and left in a cool, dark, and dry place for up to a year. Kept whole, these herbs can give you a steady supply of accouterments for your dishes for months to come.
Many chefs and gourmands swear by the quality of home-dried herbs over their store-bought counterparts, and with good reason. Herbs have a shelf-life and gradually lose their flavor over time. You can get the best assurance of flavor quality from dried herbs that were harvested fresh, as you would have known exactly when they were harvested.
The easiest method of making dried herbs is air drying, which simply involves hanging bunches of herbs in a cool, dry corner away from direct sunlight. This method leads to the familiar herb bunches seen in many rustic country kitchens. Although time-consuming, taking several days to finish, this produces the best results for low-moisture herbs with tiny leaves that dry out quickly.
Drying herbs in the oven is much faster than air drying.
For some climates, ovens and dehydrators may be the only way to dry freshly harvested herbs. It can take upwards to an hour to effectively dry herbs in the oven. A much faster version of this principle can be employed using microwave ovens, which works better for delicate herbs like cilantro.
How to Dry Fresh Herbs in the Oven
Preparation
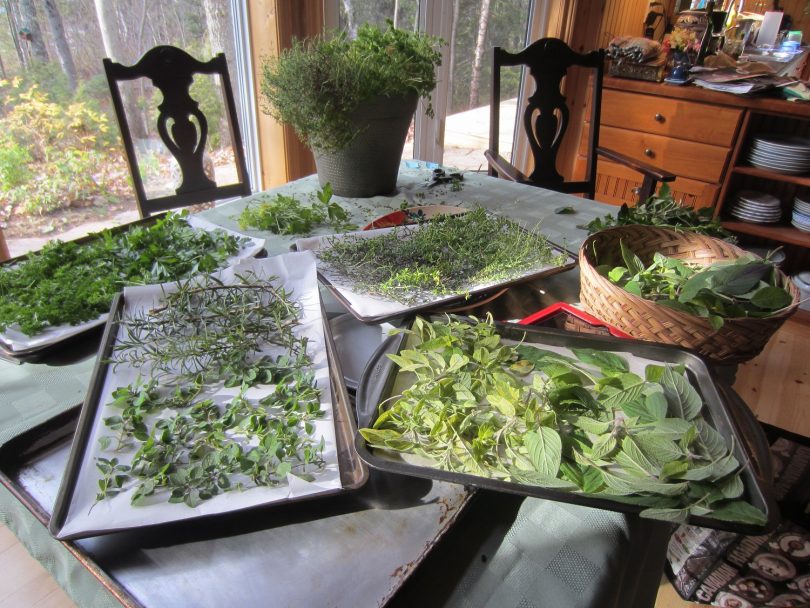
Start by carefully selecting and preparing the herbs. Choose healthy, vigorous stalks and leaves. Remove any of the dead, sickly, or dried leaves from the bunches.
For freshly harvested herbs, timing is key. Mid-morning is the best time to harvest herbs from your garden, as the dew would have evaporated while the essential oils within the plants have not. Although you may gather a lot from an especially vigorous crop of herbs, remove no more than a third to a half of your plant at a given time.
Be careful not to wash them too thoroughly to avoid adding excess water and losing the plant’s flavorful compounds. If you grew your herbs without pesticides, you will not need to wash them at all unless they were very dirty. Store-bought herbs, on the other hand, may need to be carefully rinsed.
Shake off the cut herbs to remove most of the particles and insects. Shake and pat the cut herbs dry to get as much of the water off as possible. This will help the herbs dry out faster and prevent them from cooking inside the oven, which would cause them to lose some of their flavor potency.
Principles of oven drying herbs
You must take extra caution when drying herbs in the oven. There’s always a danger of using too much heat, which can burn the herbs if left unattended.
Achieving the optimal temperature is a challenge. Ideally, herbs dry out effectively in an environment that is no more than 100 degrees Celsius (212 degrees F). An oven thermometer is an indispensable tool for this purpose, allowing you to measure the internal temperature so you can make the necessary adjustments.
Always keep the heat at the lowest possible setting. If necessary, you might need to preheat the oven and then turn it off with just the light on to achieve the appropriate temperature range for optimum results. Each oven is different, and it takes a bit of trial and error to get the appropriate combination of temperatures and settings to dry your herbs effectively.
Steps for drying herbs in the oven
- Remove the herbs from their stalks. You can either place them in a cookie sheet about an inch deep or in an oven rack covered in a muslin sheet. Carefully arrange the herbs to maximize the amount of space they have to dry out. Do not put more than one layer of herbs in the sheet or rack.
- Leave the oven door ajar. This will not only help the excess heat escape the oven, which can prevent baking or burning, but also allow the moisture to escape into the atmosphere rather than linger inside the oven.
- Let the herbs remain in the oven for about 20 minutes, then turn them over. Let them dry again for at least another 10 minutes before turning off the heat. You can repeat this process for another two to four hours or until the herbs reach their ideal consistency. Allow the herbs to cool inside the oven once cooking has finished.
- The herbs are ready once their leaves are easily crumbled by hand. The crisp herbs can then be prepared for use, either with clean hands or a mortar and pestle. Take great care to remove any hard stems that might find their way into the food.
Flavor Preservation and Storage
All herbs that are oven-dried become slightly cooked; thus, you may need to use more oven-dried herbs in your recipes. To reduce flavor loss, it is vital that you remove as much of the water as possible beforehand.
Oven-dried herbs can be stored whole or crumbled. To get the most flavor from your leftover herbs, store them whole until you need to use them. Label your dried herbs appropriately with their names and dates of harvest or purchase; this way, you keep track of how long you can use your herbs to get the maximum flavor.
READ ALSO: A Complete Guide on How to Store Dried Herbs
Despite this, dried herbs have a more concentrated aroma, which means you would need to use less of them in a dish. Unlike fresh herbs, which need to be added at the very end of cooking, dried herbs can be mixed into the food while it’s still being cooked, which can allow your herbs to have a more profound effect on your food’s flavor as they’ve been allowed to simmer.
Thank you, Jane and Alan, for the image:)